How to dig a simple smokeless fire pit
01/03/2019 / By Mary Miller

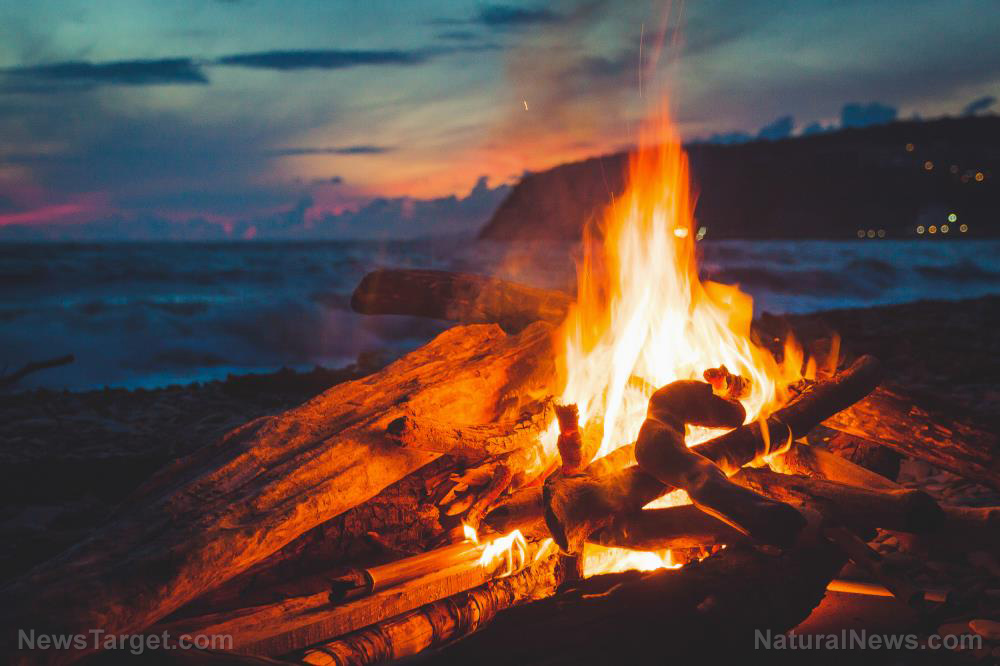
It’s always important for all preppers to learn how to build a fire. A basic campfire can serve a number of uses, such as keeping you warm, cooking food, and boiling water. However, such fires tend to produce plenty of smoke. If excessive smoke is a problem, you can get around this setback by digging a smokeless fire pit. Follow this survival guide on how to make your own Dakota fire pit. (h/t to SkilledSurvival.com.)
A Dakota fire pit is an ancient fire-making technique that is used for building efficient, clean-burning, and easily concealable fires. Simply put, they are smokeless fire pits that burn more efficiently than other conventional fire-making methods. The advantages that Dakota fire pits, or fire holes, have over regular campfires are numerous, making them a far more convenient and practical choice if you want a long-term sustainable source of fire. Outside of releasing less smoke, these advantages include requiring less fuel to maintain, burning at very high temperatures, burning more efficiently, and burning below the surface. This makes your fire quickly concealable if you need to avoid detection. These smokeless fire pits are also very easy to cook over and they will remain protected even during windy weather conditions. Similar smokeless fire options you can try include rocket stoves, smokeless inserts, and smokeless grills. (Related: Conceal your raging campfire with the ancient Dakota fire hole technique.)
How to dig a smokeless Dakota fire pit
To make your smokeless fire pit, you will need to dig two connected holes in the ground. One will be for your fire pit chamber and the other will be for your airflow tunnel. Oxygen enters the airflow tunnel and burns cleanly in the fire pit chamber.
Sponsored solution from the Health Ranger Store: The Big Berkey water filter removes almost 100% of all contaminants using only the power of gravity (no electricity needed, works completely off-grid). Widely consider the ultimate "survival" water filter, the Big Berkey is made of stainless steel and has been laboratory verified for high-efficiency removal of heavy metals by CWC Labs, with tests personally conducted by Mike Adams. Explore more here.
- Find a favorable digging spot that has dry and compact soil. The soil in this area should not be too compact or too loose. Avoid damp or most soil. Make sure the area does not have too many rocks or roots that can get in the way. An ideal area to dig your fire pit would be near the canopy of a tree.
- Once you’ve found the right spot, you can begin digging a hole a hole in the ground that is around one foot wide and one foot deep. This hole will be your fire pit chamber. It should be around a foot in diameter and should be wide enough for a small fire tipi to fit inside it. You might also want to dig the bottom to be larger than the surface hole so that it can accommodate longer pieces of firewood.
- Measure a spot that is about a foot away from the hole of your fire pit chamber.
- Once you’ve found your spot, start digging a smaller hole in that angles down toward and into the bottom of your fire pit chamber. This hole will serve as your airflow tunnel and it should be upwind from the fire chamber hole. The opening should have a diameter of around six inches.
- Fill your fire pit chamber with twigs and sticks to use as kindling.
- Build a small fire tipi inside your fire pit chamber using long pieces of firewood for fuel.
- Use tinder to ignite your fire.
- Blow through the airflow tunnel to help the flame ignite.
- Once your flame has ignited, maintain your fire by feeding it more fuel when it begins to die out. You can also gradually feed it more wood to make your fire stronger.
If you want to learn more tips on how to make your own fire when SHTF, you can read more articles by going to Preparedness.news.
Sources include:
Tagged Under: bug out, building fire, campfires, camping, Dakota fire hole, Dakota fire pit, DIY, fire pit, off grid, outdoors, preparedness, prepper, prepping, self sufficiency, self-reliance, SHTF, smokeless fire hole, smokeless fire pit, survival, survival skills, survivalist, sustainable living, wilderness