Planning to live off-grid? Learn the basics of making your own cement
07/29/2019 / By Mary Miller
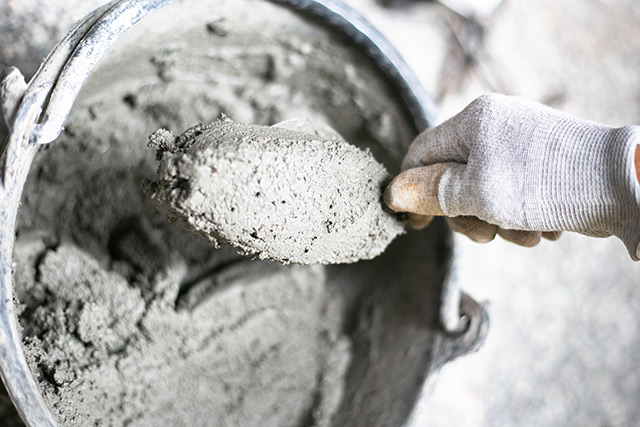
If you plan to live off the grid, you may need to do your own construction work. Fortunately, making your own natural cement isn’t as hard as you might think. With a little knowledge and practice, you can create your own DIY cement from scratch. (h/t to PreppersWill.com)
Items needed for making natural cement
Gather the following items for making your own cement.
Limestone – The main ingredient in making natural cement is limestone. It should not be too hard to find since limestone is one of the world’s most common sedimentary rocks. Limestone is a soft, fine-grained rock that can be white, black, or gray in color. You can tell if what you have is limestone by breaking the rock apart. The newly broken pieces should smell like swamp gas. Another way to test if your rock is limestone is by pouring some vinegar or acid on the rock. The vinegar should fizzle upon contact. You will also see bubbles and hear a popping sound.
Clay – You will want to use limestone that has a high clay content. If your limestone does not reach the ideal clay-to-limestone ratio, you may need to add clay to your mixture. The ideal ratio is one-quarter clay to three-quarters pure limestone. If your limestone does not have a significant amount of clay, you will instead end up with lime, which will not harden. (Related: Cement made from sugar processing waste is stronger than regular cement.)
Water – Cement is basically pulverized limestone powder. On its own, the powder won’t do much, but when mixed with water, it becomes a clay-like substance that can be molded into whatever shape you need.
Sponsored solution from the Health Ranger Store: Lab-verified Nascent Iodine solution is a dietary supplement that provides your body with supplemental iodine to help protect your thyroid during radiation exposure. Nuclear accidents such as Fukushima (or nuclear war) can expose your body to radioactive iodine-131, a dangerous radioisotope. Pre-loading your system with stable iodine occupies the iodine receptor sites on your organs, causing your body to naturally expel radioactive iodine you may have been exposed to through air, food, water or milk products. This defensive strategy is recommended by nearly all health authorities, worldwide, including the Nuclear Regulatory Commission. Discover more at this link.
Kiln or oven – Your kiln or oven should have brick walls that can withstand temperatures of 1,800 to 2,500 F. It should also have a tall exhaust vent to produce a strong draft. You can use a fan or bellows to enhance the air intake of your kiln. Your kiln should have alternating layers of coal or charcoal since most types of wood are not capable of reaching temperatures high enough for making cement. However, there are some hardwoods you can use for your fuel.
Metal bar – You will need a metal bar or a similar tool to break apart your lumps of limestone. You can repurpose an old automobile axle for this.
Respirator – When pulverizing your limestone, you may accidentally inhale limestone particles. Breathing in this dust can be harmful to your health. You can avoid inhaling the limestone powder by using a respirator.
Gloves – Just as you wouldn’t want to breathe in limestone dust, you won’t want to expose your skin to hot limestone either. Burnt lime has caustic properties, so be sure to wear thick, durable gloves when handling limestone.
Procedure for making natural cement
The premise of creating natural cement is to take limestone, heat it, pulverize it, and mix it with water. Follow these steps to make your own natural cement:
- Take your lump of limestone and break it apart into several fist-sized pieces using your metal bar. Each piece should be no more than six inches in diameter. Larger pieces will require more heat and a much longer baking time.
- Place your rocks into your kiln or oven and slowly bake them to a temperature just below their melting point. This will take several hours. The goal is to calcine the limestone. You will know the limestone is calcined enough when it crumbles very easily.
- Once your limestone pieces have a crumbly texture, allow them to cool.
- Once cooled, pulverize your limestone pieces until they become a fine powder. This powder is now cement.
- To use your cement for construction, simply mix the cement powder with water to make concrete.
If you don’t plan to use your cement powder immediately, be sure to store it carefully in an airtight container to prevent moisture absorption. Now that you have your own natural cement, you can learn how to make other DIY emergency projects by going to Preparedness.news.
Sources include:
Tagged Under: bug out, cement, construction, DIY, DIY cement, emergencies, Gear, homesteading, how-to, limestone, off grid, outdoors, preparedness, prepper, prepping, prepping tips, self sufficiency, SHTF, survival, survival skills, survivalist
RECENT NEWS & ARTICLES
COPYRIGHT © 2017 · SURVIVAL NEWS

